Hudson Creative Documentation
Google Analytics 4 : Set Up
Table of Contents
I: Create the GA4 Account and/or Property
II: Add the GA4 Configuration to Google Tag Manager
I: Create the GA4 Account and/or Property
Navigate to https://analytics.google.com
Go to the Admin cog wheel at the bottom left
Click Create Account
Name the account the business name and select all of the data sharing options, then click Next
Name the property the Website URL (ie: hudsoncreative.com)
Set the Time Zone to (GMT-04:00) New York Time and leave the Currency as US Dollar ($), then click Next
Click the blue Create button to create your Google Analytics 4 property!
Click the Web option
Under Website URL select https:// and paste the website URL we will be tracking (ie: hudsoncreative.com)
Under Stream Name, type in the business’ name
Toggle Enhanced Measurement so that it is on
(enhanced measurement items are things that GA4 can track “out of the box”)
Click the blue Create Stream button
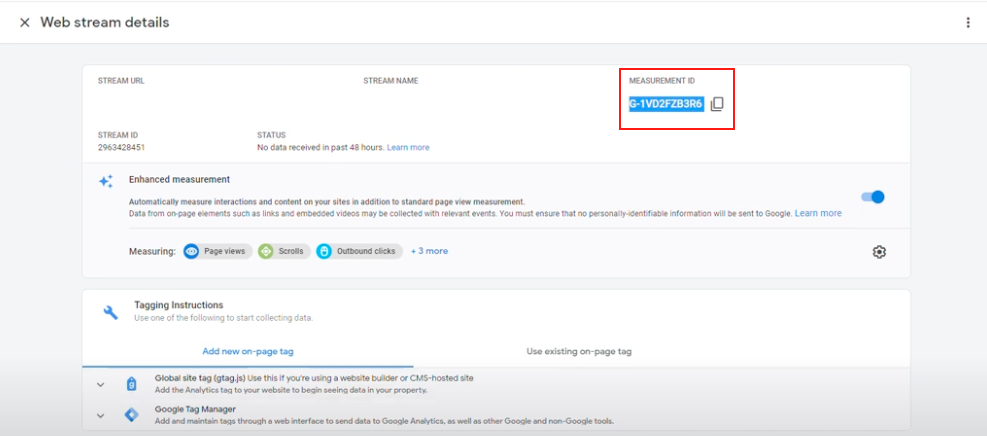
Success! We have officially created a GA4 Property with some enhanced measurements.
Now, we need to make sure GA4 is configured to work with the website and begin tracking data.
*** If Google Tag Manager is not installed on the site, please view the Installing Tag Manager Process Documentation and then come back here ***
II: Add the GA4 Configuration to Google Tag Manager
Navigate to Google Tag Manager: https://tagmanager.google.com/
Open the Account and Workspace for the website we are working on
Click Tags in the left-side menu
Click the light-blue New button to create a new tag
Change the name Untitled Tag at the top-left to Google Analytics (GA4) Configuration
Click inside the Tag Configuration box
Choose (click) the Google Analytics: GA4 Configuration tag type
For the Measurement ID field, copy and paste in the Measurement ID that was shown in Google Analytics 4 (after Step 12 above)
Ensure “Send a page view event when this configuration loads” is checked to be ON
Click into the Triggering box to set up the tag’s trigger
In the side-menu pop-up, choose (click) the All Pages (Page View) trigger
Click the blue Save button at the top-right
Click the blue Submit button at the top-right
Type Hudson Creative Google Analytics 4 Set Up as the Version Name and click Publish