Hudson Creative Documentation
Facebook Page Process Documentation
Intro:
Pages are for businesses, brands, organizations and public figures to share their stories and connect with people. Like profiles, Pages can be customized with stories, events and more. People who like or follow a Page can get updates in the News Feed.
NAP: NAP is an acronym for Name, Address, and Phone number. The NAP for the business needs to be correct and consistent when optimizing your website and online presence for local search because Google values accurate information for its users. NAP consistency is important for local SEO because matching NAPs show legitimacy and improves the chances to rank the local business well. It also provides search engines and potential new customers with the most essential information about the business.
What You’ll Need:
- Client’s Login Information (ALA sheet or LastPass)
- Client’s ABIS
Local Listing Steps:
- Create / Claim
- Update with ABIS Information
Create / Claim:
Typically, the Accounts team will ensure access to a client’s Facebook account.
If there’s no existing Facebook page:
- Go to facebook.com/pages/create.
- Click to choose a Category.
- Fill out the required information.
- Click Create Page.
- Add an optional profile or cover photo, then click Save.
Update with ABIS information
Once we’ve gained access and the ABIS has been approved, we can move forward with updating the listing with the information that’s on the ABIS.
Login to Facebook using the credentials the client has provided
Note: It’s also possible that we have access to their Facebook page through [email protected], so please double-check with the accounts team as well.
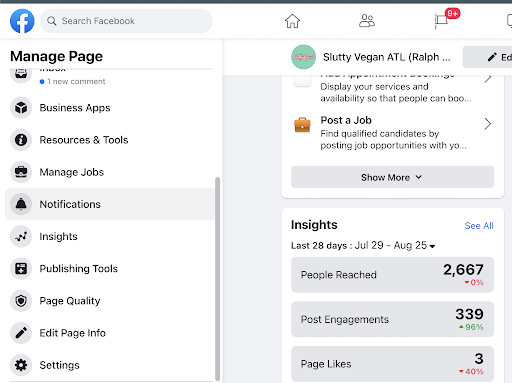
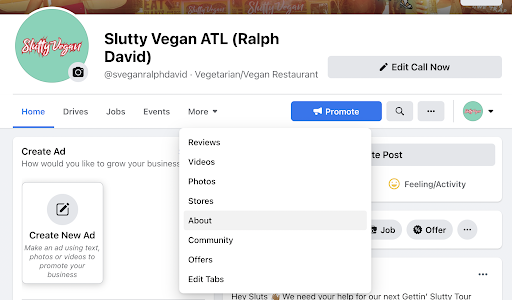
Go to Edit Page Info.
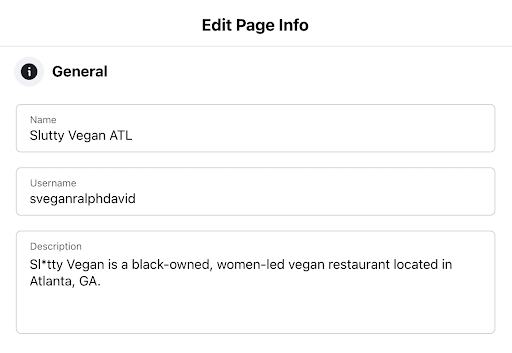
Under General
- Name
- Use Business Name that’s in the ABIS
Username
- Confirm with your manager what the correct Username is. Usually, it’s already set and done, but it’s best to do this to be sure
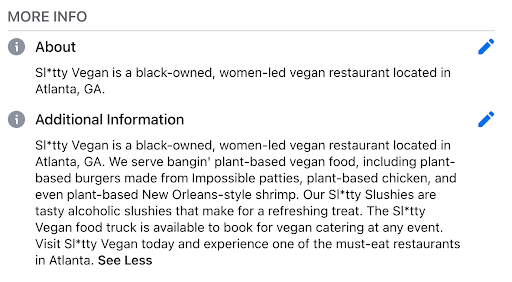
Description
- Use Business Description that’s in the ABIS
Under Contact
- Phone Number
- Use Business Primary Phone Number that’s in the ABIS
Whatsapp Phone Number
- Skip, unless it’s provided in the ABIS
- Please click the My Page doesn’t have a WhatsApp number radio dial
- Use Business Email Address for Public Display that’s in the ABIS
Website
- Use the Website URL that’s in the ABIS

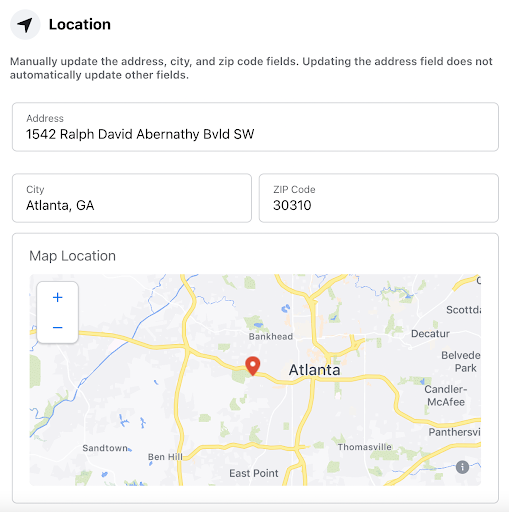
Under Location, please provide the necessary information that’s provided in the ABIS and them to their corresponding fields.
Under Service Area, use Areas You Serve that’s in the ABIS
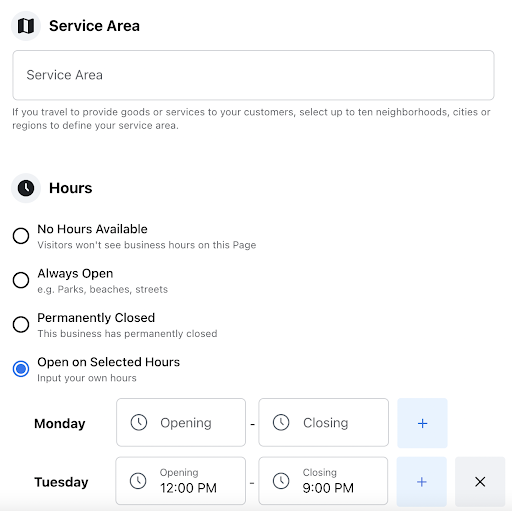
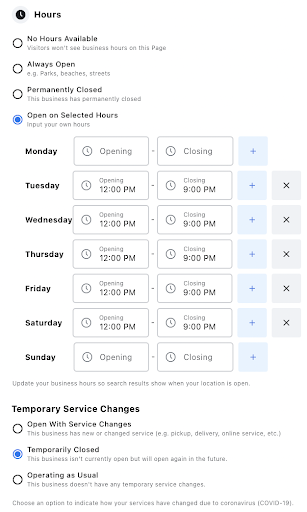
Under Hours, use Hours that’s in the ABIS
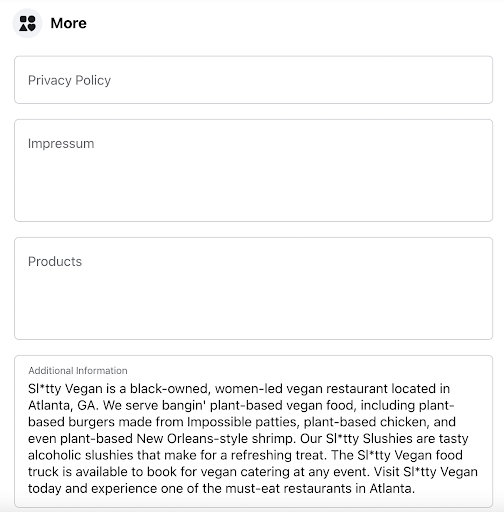
Under More
- Leave Privacy Policy, Impressum, and Products blank unless ABIS has information on this
- Additional Information
- Use Business Description that’s in the ABIS
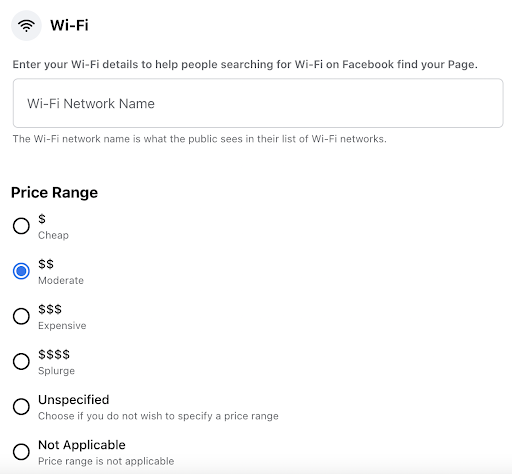
Leave Wi-Fi as blank. For the Price Range, choose Moderate
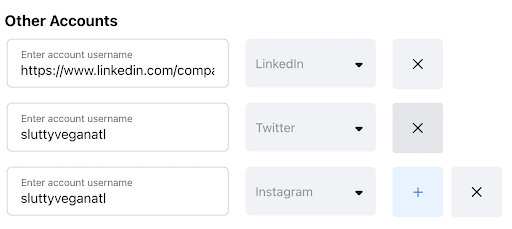
Under Other Accounts, add the LinkedIn, Twitter, and Instagram URLs, if applicable.
Double check if the information that you added is reflecting on the page by going to the About section
Online Order URL
1. Click the call-to-action button below your Page’s cover photo and select Edit Button
2. Click Start Order
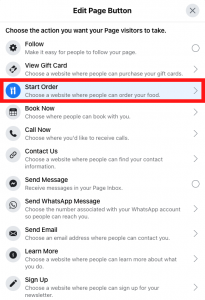
3. Enter your the link or Online Order URL
4. Click Save
To add menu:
1. Click See Menu.
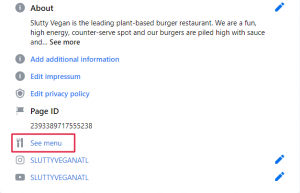
2. Click Edit.
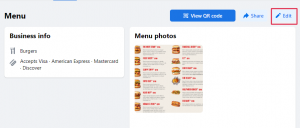
3. Fill out the Business Info.
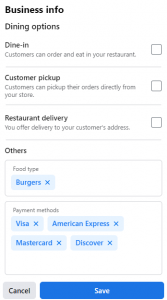
4. Lastly click Save.
Finishing Up
Once the Facebook listing has gone through all three steps of Create / Claim, Verify and Update with ABIS information, it can be considered complete.
- At this point, double check that all the information on the listing matches what’s on the ABIS. Especially the NAP.
- Copy the Facebook page URL
- Paste the link into the ABIS in the cell: “Facebook URL”
- (Optional): Paste the link into the ALA sheet (non-Pepsi clients)
- Lastly, make sure the login information is correctly recorded in the ALA sheet (non-Pepsi clients)
- Paste the Facebook page URL into the Asana task and check it off