Hudson Creative Documentation
Apple Maps Process Documentation
Intro:
If you have a small business, you can use Apple Maps Connect to add or update your business information that’s shown in Maps, to help customers find you.
NAP: NAP is an acronym for Name, Address, and Phone number. The NAP for the business needs to be correct and consistent when optimizing your website and online presence for local search because Google values accurate information for its users. NAP consistency is important for local SEO because matching NAPs shows legitimacy and improves the chances of ranking the local business well. It also provides search engines and potential new customers with the essential information about the business.
What You’ll Need:
- Client’s Login Information (ALA sheet or LastPass)
- Client’s ABIS
Local Listing Steps:
- Create / Claim
- Verify
- Update with ABIS Information
Create / Claim:
Typically, the Accounts team will ensure access to a client’s Google account and Google my Business listing. Often, a Google my Business account is linked to the business owner’s Google email account.
When there’s no existing listing available:
- Go at https://register.apple.com/placesonmaps
- Click Sign in with your Apple ID
- Provide the information needed to the space provided
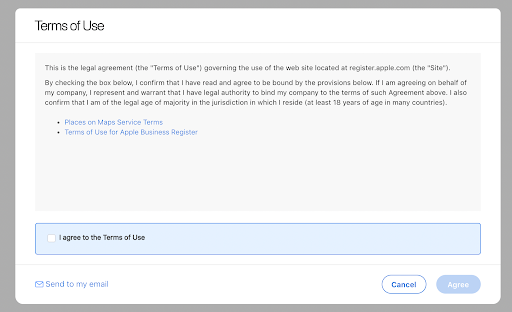
- Tick the “I agree to the Terms of Use” checkbox
- Click Agree
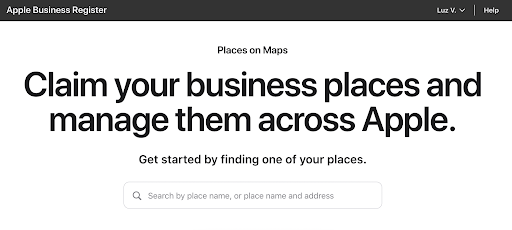
Add the business name in the search bar.
If the business is non-existent in Apple Maps, it’ll show this message.
Click Add a missing place.

Provide all the information needed. Make sure that this information is from the client’s ABIS sheet.
- Place Name
• Needs to match the ABIS
• Use “Business Name” - Phone Number
• Use ABIS – “Business Primary Phone Number” - Website
• Needs to match the ABIS
• Use ABIS “Website URL” - Primary Category
• Use ABIS “Categories (Sushi Restaurant, American Cafe, etc.)” - Address
• Use ABIS “Address”
• You can click Add Manually to ensure that you’ll be adding the information to the right places
After you’ve added all the information, you’ll be directed to this page:
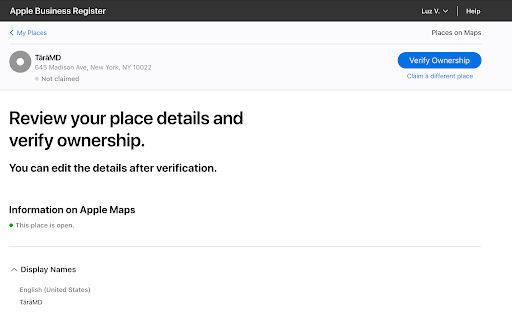
To verify your listing, click Verify Ownership.

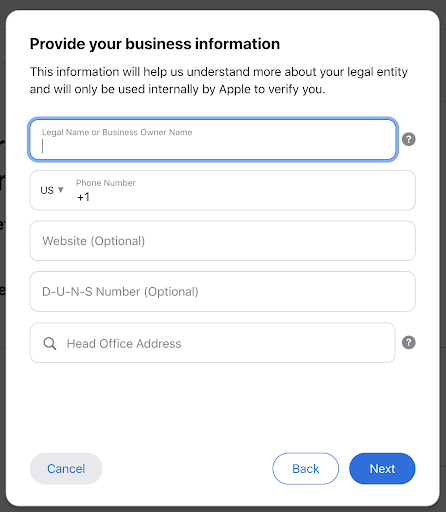
Provide all the information needed to proceed:
- Legal Name of Business Owner Name
• Needs to match the ABIS
• Use “Postcard Verification Address Person” - Phone Number
• Use ABIS – “Business Primary Phone Number”
- Website
• Needs to match the ABIS - Use ABIS “Website URL
• D-U-N-S Number
• Skip - Head Office Address
• Use ABIS “Address”
• You can click Add Manually to ensure that you’ll be adding the information to the right places
You can also address manually. Make sure to add information from the client’s ABIS
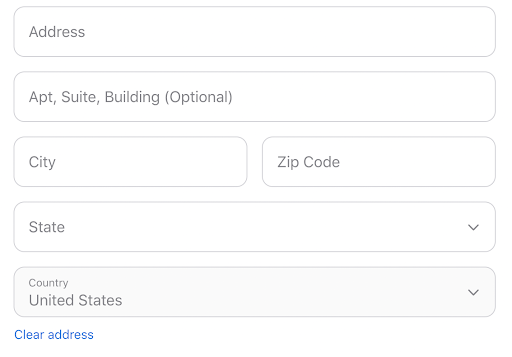
- Click Next
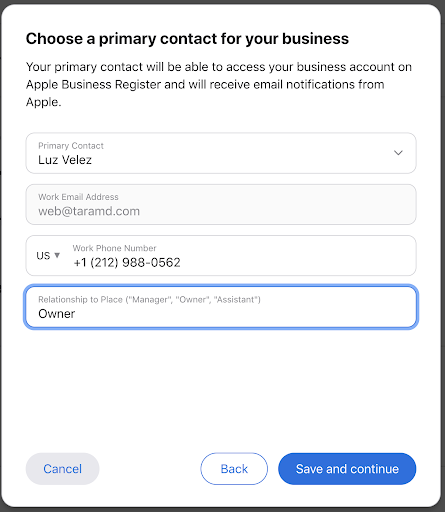
- In the Choose a primary contact for your business screen:
- Primary Contact
- Needs to match the ABIS
- Use “Postcard Verification Address Person”
- Work Email Address
- skip
- Work Phone Number
- Needs to match the ABIS
- Use ABIS – “Business Primary Phone Number”
- Relationship to Place
- Write Owner
- Primary Contact
- Click Save and Continue
You now have two options in verifying the listing. You can connect with the client’s account manager to verify it by phone.
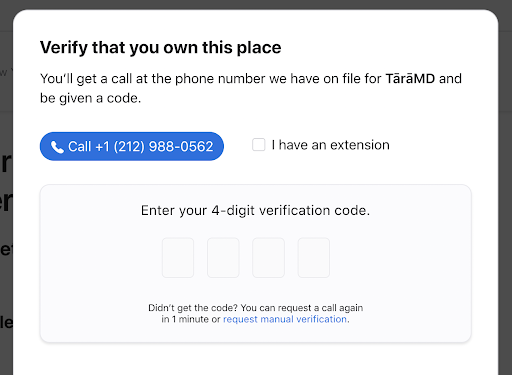
If verification documents are available in the client folder, you may opt to verify manually.
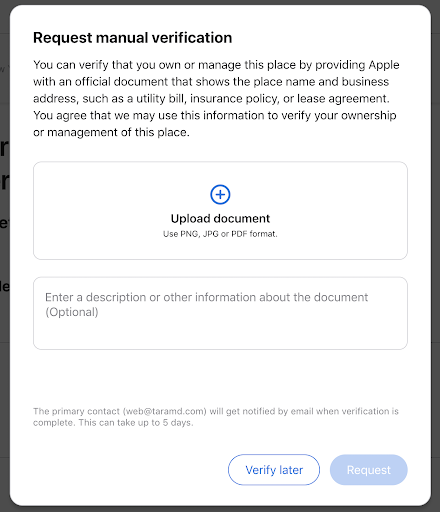
If you choose to verify later, you may be able to see this screen:

Update with ABIS information
Once we’ve gained access, and the Apple Maps listing is verified, and the ABIS has been approved, we can update the listing with the information on the ABIS.
If there are listings connected to your account, you may see this screen:
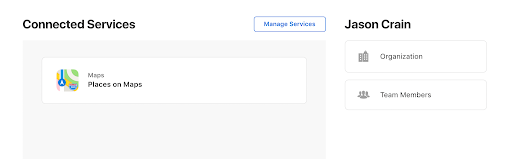
Click Maps to start and choose the listing that you’re looking for:

You’ll be then directed to this screen:
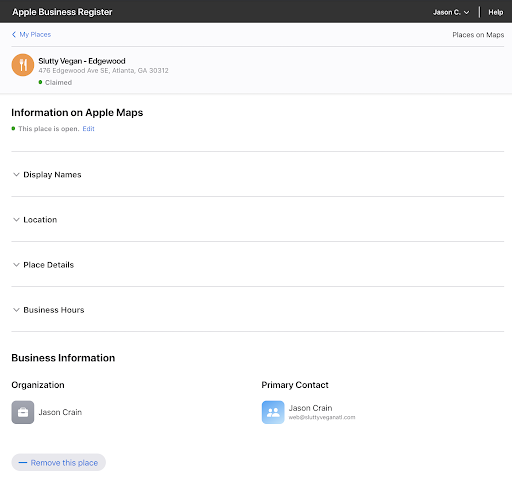
In the Information on Apple Maps section, click Edit.

Make sure to choose the appropriate option:
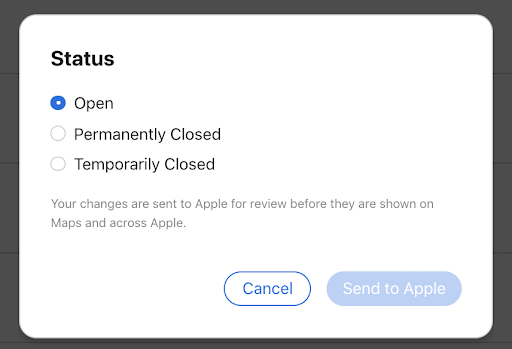
Click the arrow beside Display Names. Click Edit

Make sure to add the Business Name from ABIS.
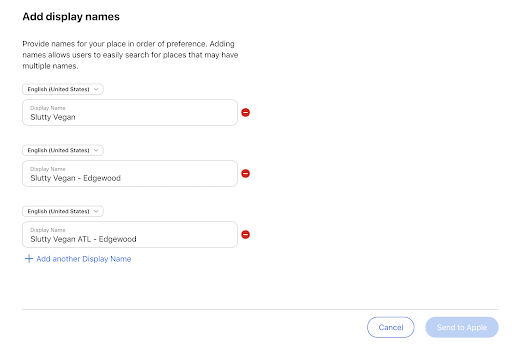
Click Send to Apple after adding all the information.
Click the arrow beside Location. Click Edit.
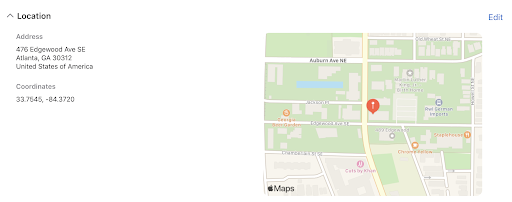
Check ABIS and add all information related to address in the right fields.
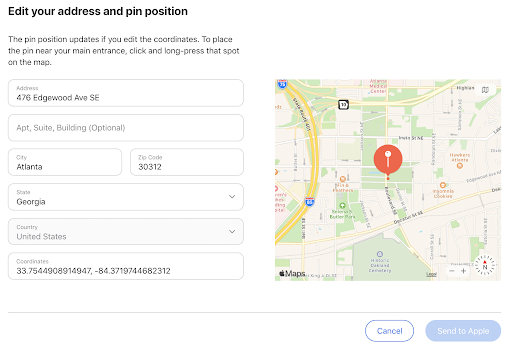
Click Send to Apple after adding all the information.
Click the arrow beside Place Details. Click Edit.
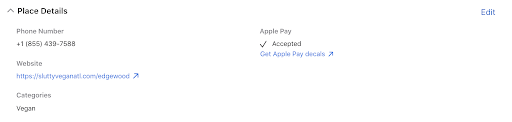
Check ABIS and add all information related to the address in the correct fields.
- Phone Number
• Needs to match the ABIS
• Use ABIS – “Business Primary Phone Number” - Website
• Needs to match the ABIS
• Use ABIS – “Website” - Business Category
• Use ABIS – “Categories (Sushi Restaurant, American Cafe, etc.”
• Try to add as many from the ABIS that match, as possible
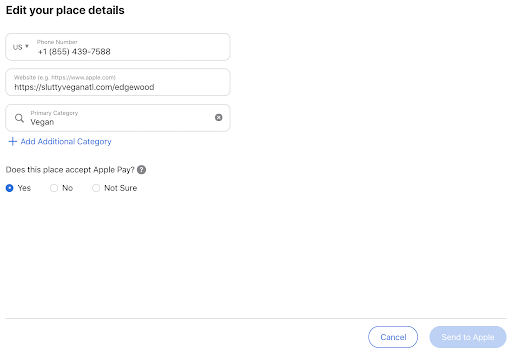
Click Send to Apple after adding all the information
Click the arrow beside Business Hours. Click Edit.

Check ABIS and add the hours.
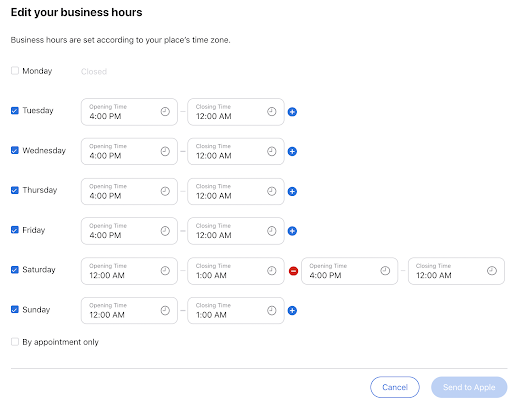
Click Send to Apple after adding all the information.
Finishing Up
Once the Apple Maps listing has gone through all three steps of Create / Claim, Verify and Update with ABIS information, it can be considered complete.
- At this point, double-check that all the information on the listing matches what’s on the ABIS. Especially the NAP.
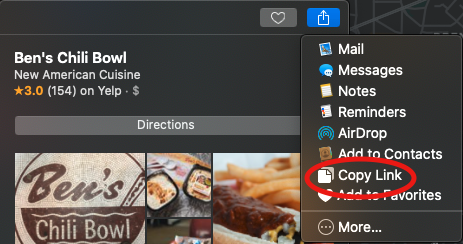
- To get the link you have to search for the business on the Mac “Maps” app and then you can copy the share link from there to add to the task (as confirmation that the listing is verified, live and complete)
- Typing “[business name] [city],[state]” into Maps should bring up the listing if it’s already been verified.
- Click the box with the arrow pointing upwards to bring up the “Share” options, and select “Copy Link”