Hudson Creative Documentation
YouTube Channel Process Documentation
Intro:
A channel is a member’s personal presence on YouTube, similar to other social media sites. Select another member’s name to visit that person’s personal channel. You’ll be able to see all the member’s videos and anything the user picked as a favorite, as well as anything else they want to share like their favorite channels.
YouTube provides a place to browse through YouTube channels where you can check out popular channels and subscribe to them if you choose to do so. Your subscriptions are listed whenever you visit YouTube for easy access to your favorite channels.
NAP: NAP is an acronym for Name, Address, and Phone number. The NAP for the business needs to be correct and consistent when optimizing your website and online presence for local search because Google values accurate information for its users. NAP consistency is important for local SEO because matching NAPs show legitimacy and improves the chances to rank the local business well. It also provides search engines and potential new customers with the most essential information about the business.
What You’ll Need:
- Client’s Login Information (ALA sheet or LastPass)
- Client’s ABIS
Local Listing Steps:
- Create / Claim
- Update with ABIS Information
Create / Claim:
Typically, the Accounts team will ensure access to a client’s YouTube account.
- Log in using the client’s email address.
- Once you’re logged in, go to youtube.com
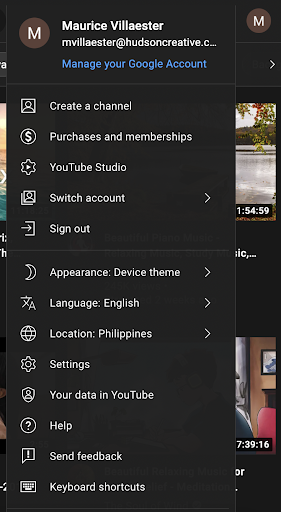
- Click the icon that’s on the top-right corner of the screen.
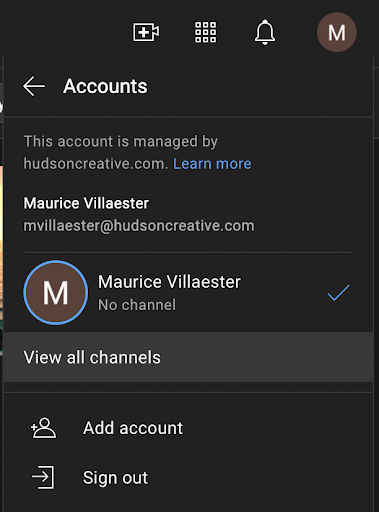
- Click Switch account
Click View all channels
Click +CREATE A CHANNEL
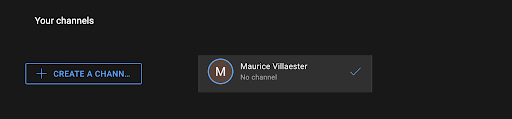
Under Channel Name, provide the client’s official Business Name (please see ABIS for this)

Update with ABIS information
Once we’ve gained access and the ABIS has been approved, we can move forward with updating the listing with the information that’s on the ABIS.
How To:
- Log in using the client’s email address.
- Once you’re logged in, go to youtube.com
- Click the icon that’s on the top-right corner of the screen.
- Click Switch account
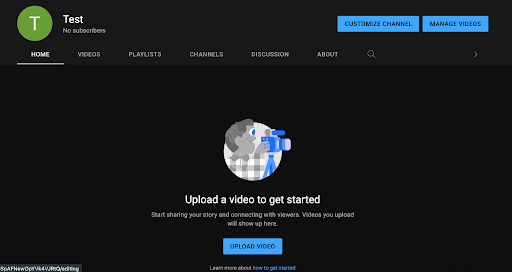
- Choose the channel that you’re working on
- Click CUSTOMIZE CHANNEL
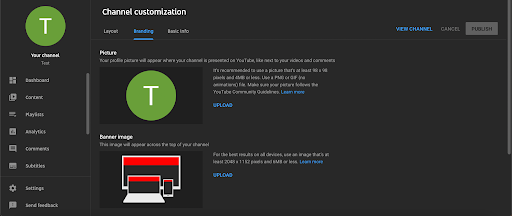
Under Channel customization, go to Branding tab. For Photos, upload the logo that’s in the client’s folder
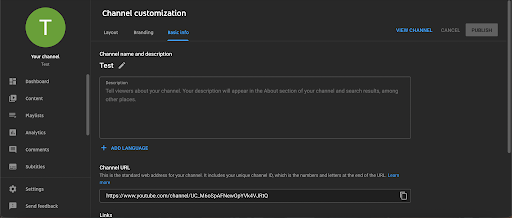
Under Channel customization, go to Basic info tab. For Photos, upload the logo that’s in the client’s folder
- Under Channel name and description, for the Description, add Business Description that’s in ABIS
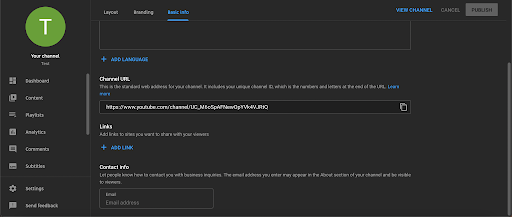
- For Links, add the links that are in the ABIS. Some links to include:
- Website
- Yelp
- Note: Sometimes, these links are not available, so feel free to maximize all the links provided in the ABIS. YouTube allows five (5) links.
- For contact information, add Business Email Address for Public Display that’s in the ABIS
Finishing Up
Once the YouTube listing has gone through all three steps of Create / Claim, Verify and Update with ABIS information, it can be considered complete.
- At this point, double check that all the information on the listing matches what’s on the ABIS. Especially the NAP.
- Copy the channel link
- Paste the link into the ABIS in the cell: “YouTube Page URL”
- (Optional): Paste the link into the ALA sheet (non-Pepsi clients)
- Lastly, make sure the login information is correctly recorded in the ALA sheet (non-Pepsi clients)
- Paste the YouTube channel URL into the Asana task and check it off