Hudson Creative Documentation
Process Documentation
Intro
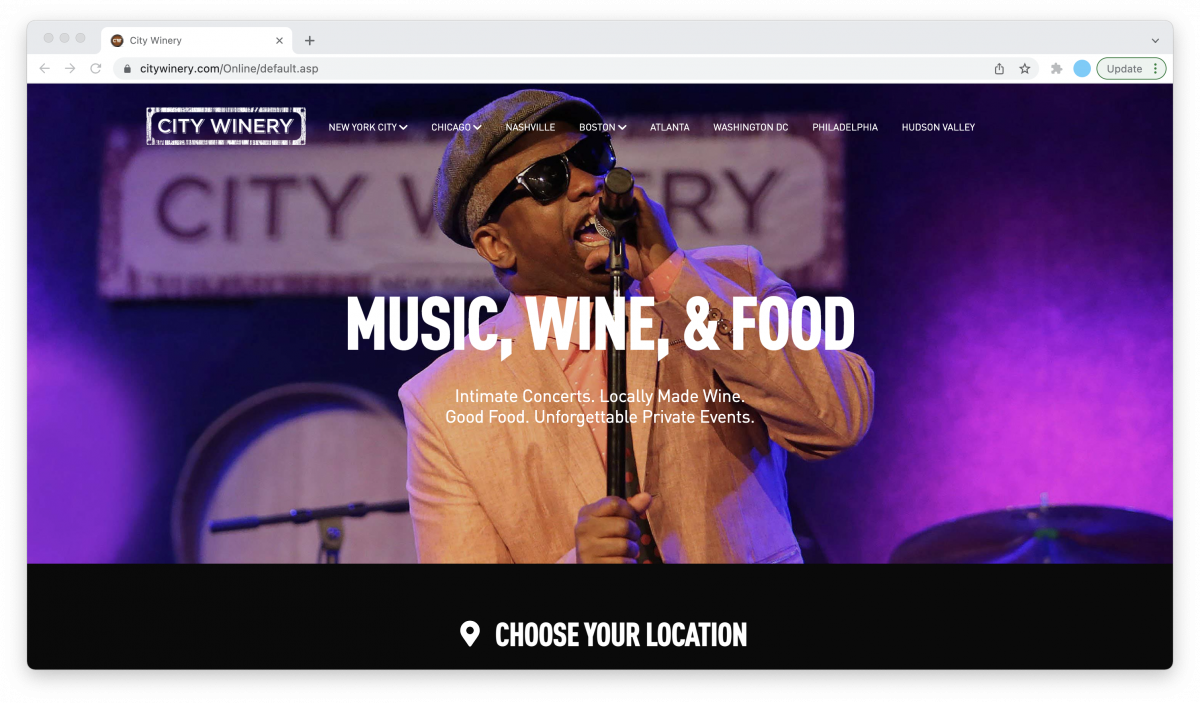
City Winery is a group of wine bars, restaurants, and concert venues based in New York City, with locations throughout the United States. Their web presence is built on top of the AudienceView ticketing platform, which allows them to sell concert tickets, merchandise, venue memberships, and lots of delicious wine.
Their online needs are many, and the company stretches AudienceView to its technical limits, not only using it for ticketing and ecommerce purposes, but also as the central hub for numerous other parts of their business—scheduling wine tastings, organizing restaurant reservations, hosting private events, and more.
Thankfully, AudienceView has already done much of the heavy lifting for us, and our contributions to their web presence have been mostly limited to CSS styling and minor changes to the JS templates used to generate new product pages (or “articles” in AudienceView parlance).
Consider this an overview of the parts of City Winery’s web presence that Hudson Creative has worked on in the past. While AudienceView provides fairly thorough documentation for its product, this simplified guide is intended to walk you through the places where Hudson Creative has contributed to citywinery.com so far.
Logging In
When AudienceView initially built the City Winery website, they set up two identical versions: a “live” production site that users encounter at citywinery.com and a staging site where developers can build out new features before rolling them out in full.
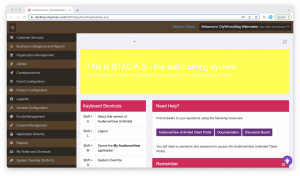
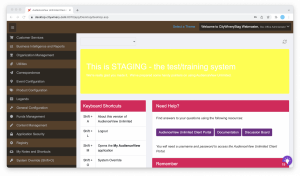
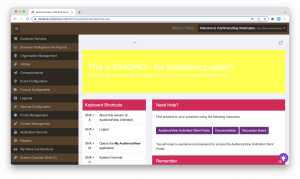
To log into the Content Management System (CMS) for the staging site, navigate to https://desktop.citywinery.com:8070/, select the “Desktop” option, and log in with the credentials listed in City Winery’s ALA sheet. Once logged in, you should see a title stating “This is STAGING – the test/training system” and a menu sidebar with options for Customer Service, Organization Management, and more.
To view any changes made to the staging site, navigate to https://desktop.citywinery.com:8070/ and select the “Online” option. This should redirect you to the front-end of the staging site, where you can login into our test account using the credentials listed in the ALA sheet.
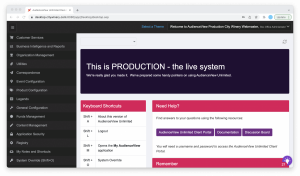
The process of logging into the production site is very much the same. Navigate to https://desktop.citywinery.com:8080/ (note the difference between 8070 and 8080), select the “Desktop” option, and log in with the credentials listed in City Winery’s ALA sheet.
Changes made to the production site should be visible at citywinery.com, but can also be found at https://desktop.citywinery.com:8080/ by clicking the “Online” option.
Content Management
“Content Management” is the place to go for making changes to individual webpages. These include the HTML markup that goes between the header and footer of most City Winery web pages, the CSS files that aestheticize the site, the categories assigned to each article that align it with a specific subdomain corresponding to a City Winery venue, and more.
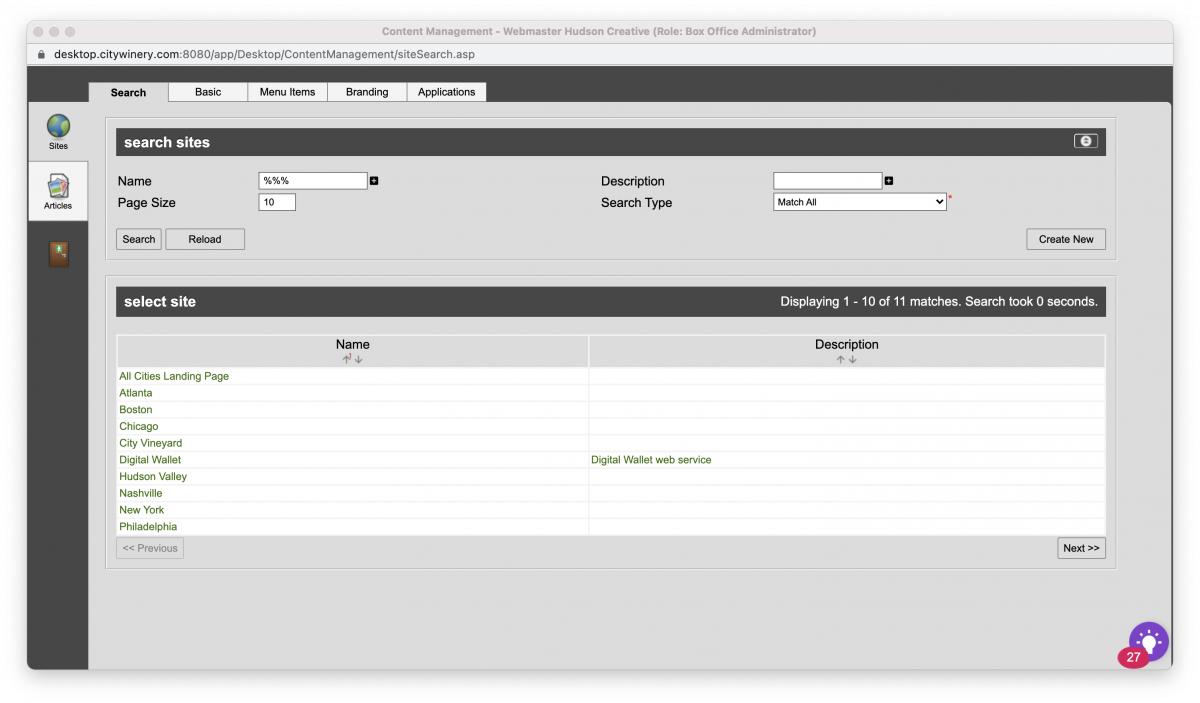
On the left side of the “Content Management” window, you should see three tabs labeled “Sites,” “Articles,” and—more discreetly—“closeWindow().” Navigating to the “Sites” tab will reveal the option to search for the site you’re trying to edit. Using the wildcard character “%” (without quotation marks) will turn up search results including all the City Winery sites at once.
Modifying CSS Stylesheets
After selecting the site you’re looking for within the “Content Management” window, choose the “Branding” tab in the menu bar at the top and select the name of the site in question. This will open another menu with an option to replace the stylesheet.
Versions of the “CW_CSS_Unlimited_v7.css” stylesheet are used on each site except for the City Vineyard location, which has its own “cityvineyard.css” stylesheet that includes the green header section you see at https://citywinery.com/cityvineyard. There’s also a “CW_CSS_Unlimited_v8.css,” which is reserved for the multi-site landing page visible at https://citywinery.com/.
To upload a new stylesheet to the editor, choose the “Select file” button next to the “Stylesheet” title, which opens up a City Winery file editor. On the left side of this file editor, you’ll see a menu containing the file directory for the stylesheets, images, and JavaScript files used on the front-end of the City Winery website.
From there, navigate to the “CSS” folder within the “Files” directory, where you can drag the updated stylesheet into the folder. The stylesheets are organized by the dates within their filename such that “CW_CSS_Unlimited_v7_1242022.css” was uploaded on January 24, 2022. Rename your new stylesheet according to this convention, drag it into the folder, and double-click on the file to attach it to the site.
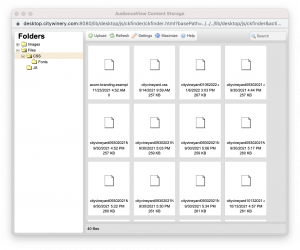
This section can also be used to add new images to the City Winery site. In the file menu on the left-hand side of the page, choose the “Images” folder. Do your best to place the image in a folder that corresponds with its role on the site (this section is admittedly a bit disorganized…), and be sure to copy the file path of the image so you can add it to the HTML markup of your project.
There may be other ways to upload images to AudienceView (this one is admittedly kinda clunky), but for the few images that we’ve added to the site so far, this has done the job. Check out the AudienceView documentation for more on how to upload images and reorganize where they’re stored within AudienceView.
AudienceView CSS Bug
It’s worth mentioning that at the time of writing, there are a few bugs in AudienceView involving the naming convention of each CSS file. I’m fairly certain this only exists on City Winery’s production site, but if you delete a stylesheet that’s already attached to the page, that stylesheet remains connected to the page until another one is attached in its place.
Your stylesheet must also have a unique filename that’s different from the one that’s previously been uploaded to the system. If the two files have the same name, AudienceView will defer to the older version of the stylesheet with that name, even if it has already been deleted. This has forced me to get in the habit of adding the date to each new iteration of the file.
At times, you’ll surely find yourself uploading multiple files per day, which can cause the issue mentioned above. As a workaround, I’ve made a habit of adding “NEW” to later iterations of the stylesheets uploaded on the same date as ones already in the system. It’s not the most ideal solution, but it does do the trick without having to worry about underlying issues with AudienceView.
Modifying Articles
The “Content Management” section also allows you to modify the web pages that make up much of the City Winery website. Below the “Sites” tab in the left-side menu, you’ll see an “Articles” tab, which opens up a window that allows you to make changes to the site’s articles.
Articles include everything from the homepages and landing pages that make up each site to the product pages and show articles that are used in multiple places across sites. They contain the bulk of the HTML skeleton for what happens on citywinery.com between the header and the footer.
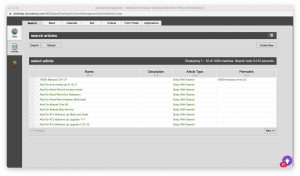
As with the “Sites” section, users can find every article that currently exists on the site by entering the “%%%” wildcard into the search bar and pressing the “Search” button. The best way to locate a specific show article is to grab the permalink parameter from the URL. Within the URL in your browser, you should see a parameter similar to “permalink=NYC-Candlelight-Concert-Series-2-7-22-6pm”. Searching “NYC-Candlelight-Concert-Series-2-7-22-6pm” in the Articles tab will take you to the specific article in the window.
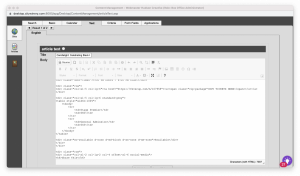
Once you click on the article you’re looking for, you’re taken to the “Basic” tab for that specific article. To modify the HTML for that article, navigate to the “Text” tab in the top menu and click on the “Source” button to toggle between a live preview of the HTML and the source code (similar to the main rich text editor in WordPress). From there, you can make various modifications to the HTML for the article. Be sure to press the “Apply” button to save any changes you make.
Show articles often make use of the “Calendar” tab, to assign a date and time to each event. This is mostly something that City Winery will handle for us, but updating the date and time is a simple as selecting a new date and time within the date selector.
Creating New Articles
At times, you will be tasked with creating new articles for City Winery’s website. This is also done within the “Content Management” section of AudienceView, where from the “Articles” tab, you can hit the “Create New” button to start building out the article you’re trying to create.
But before creating the article, it makes sense to give it a name and provide a few basic details about your intention for the article to make it easier to locate within the AudienceView CMS in the future.
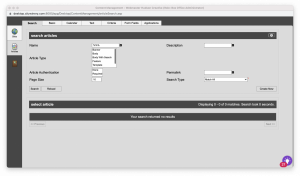
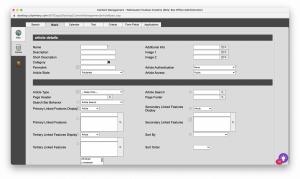
To make these changes, you’ll want to select the “Basic” tab from the menu at the top, which provides a variety of fields to fill out to keep your article organized within the organizational structure of AudienceView.
Required fields are marked with red asterisk, but it’s also essential to include a permalink so that you can view the article on the front-end of the site. For Show Articles, you’ll also want to choose “Body With Search” from the “Article Type” dropdown, which allows the article to appear on search pages like City Winery’s “Upcoming Shows” page.
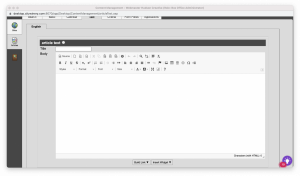
It’s also important to add a page title to each show article. To do this, click on the “Text” tab in the menu at the top of the page and enter the page title into the input field labeled “Title.” The “Body” field below is where the HTML markup for your show article will ultimately go.
Assigning New Show Articles to City Winery Sites
Each City Winery show article must be attributed to the specific City Winery location in which the show takes place. For example, a show article for an upcoming event at City Winery’s New York City location needs to be assigned to that location within AudienceView for the show article to correctly populate on that site.
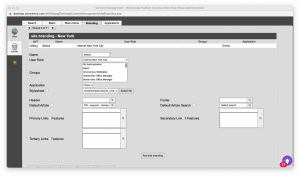
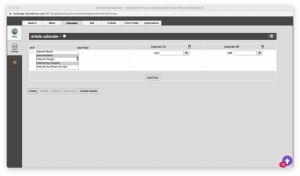
To assign a new show article to a City Winery site, select the “Calendar” tab at the top of the “Articles” section of the “Content Management” window and click on the “Add Entry” button. This button will create a row in the table with a variety of options for the “User Role” for this specific article.
In this field, find the “Internet” option with the name of the location you want to assign this specific show article to. For example, select “Internet New York” to assign your new show article to the site for City Winery’s New York location.
You can assign a single show article to multiple City Winery sites. To do this, hold down the Control key (Command on a Mac) when you click on a second City Winery location name. Both location names should now be highlighted, and you can continue to select as many show articles as you need using this method.
Once your show article is ready to publish, be sure to press the “Create” button near the bottom of this window, which publishes the new article in the AudienceView CMS.
General Configuration
The “General Configuration” window allows you to modify payment methods, Vinofile Wine Club memberships, concert tickets, and more. A link to the section can be found on the AudienceView desktop homepage, where it sits in the menu on the left-hand side of the page with an accompanying wrench icon.
Modifying Scripts
Historically we’ve used the “General Configuration” menu to modify AudienceView script files. These are JavaScript files (at least the ones we’ve worked on have been) which are used to generate the HTML for various parts of the site. To find these files, open the “General Configuration” window from the main desktop screen of the CMS described above and select the “Content Management” tab. This will open a new window in your browser which also features a menu on the left-hand side of the page. Select “Scripts” from the menu and search for the script that you’re looking for.
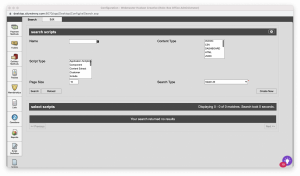
Most of what we’ve worked on so far has been limited to the JS script file for the “Show Articles.” To find this script file, search for “CW Show Article Builder” in the search bar. As with the “Content Management” section, you can also use the wildcard “%%%” to return all of the script files with a single search. There are about three hundred scripts total, so it’s generally easiest to locate files by file name. Most of the script files specific to City Winery are prefaced with the letters “CW”.
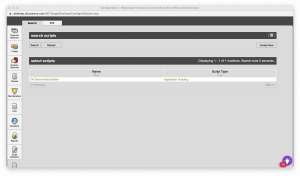
Clicking on the file name will take you to the JavaScript file for the script. There, you’ll find all of the JS elements (functions, variables, conditional statements, etc.) used to create each show article. Toward the end of the file (around line 743 at the time of this writing), you’ll see a variable called “newBody” which generates the HTML for each show article. As with other parts of AudienceView, clicking the “Apply” button will save any changes made to this file.
It’s very easy to make destructive changes to this file, so make sure that you are thoroughly testing your changes on the staging site before implementing any changes on production! This script (along with many others) is run nightly on the production site to ensure that all of the content on the site is up-to-date and styled consistently. Any JavaScript errors will prevent the script from compiling, and the show articles will not be updated accordingly.
Utilities
So far, our changes in the “Utilities” window have been limited to testing the scripts mentioned above. A link to the “Utilities” window can be found in the same desktop window that contains links to the “Content Management” and “General Configuration” windows, with a paperclip icon in place of a wrench or pencil.
Clicking on the “Utilities” link will open up a new window that, at least at the time of this writing, has a more modern look and feel than the others we’ve discussed so far. On the left-hand side of the page, you’ll see a menu with arrows for the two bottom icons. The upward-pointing arrow (which has a little “Data Management” label upon hover) will take you to the “Data Management” page, where you can test the JS script files we discussed in the “General Configuration” section.
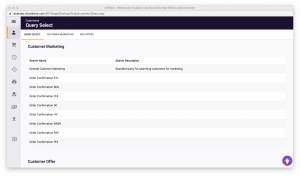
In the “Name” field, enter the query “%article show builder%” (without the quotation marks of course) to return a file named “Article Show Builder – Manual Execution”. This allows you to run the JS script file on a specific show article to test any changes you may have made. Clicking on the “Article Show Builder – Manual Execution” title will take you to a new page titled “Job Details”. Scroll down to the “Job Data Sources” section, where you’ll see a field labeled “Details”.
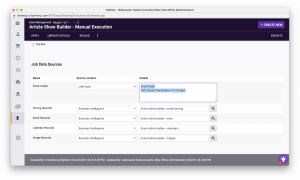
Inside this field, there should be text that says “Event Code” and a permalink for the specific show article that you want to run the script on. Enter the permalink for the correct show article (these can be found inside the URL for each show article in the form of a parameter labeled “permalink=NYC-Donna-The-Buffalo-1-27-22-8pm”). Make sure not to delete the “Event Code” text or line break, as this will prevent the script from running!
Once you’ve added the permalink for the show article you’re trying to update, scroll back to the top of the page and click the “Apply” button in the upper-left corner of the page and “Execute” button in the upper-right corner. A popup notification should appear on-screen after the pressing of each button.
To confirm that the script ran successfully, select the “Results” link in the navigation bar at the top of the page. This will display a log of every attempt to run the script. Successful attempts will have a “1” in the column labeled “Successful Rows”, while unsuccessful attempts that threw an error will have a “1” in the “Failed Rows” column.
In the event that your script throws an error, you can start the debugging process by clicking the first link within the “Failure Results Files” column. This CSV (Comma-Separated Values) file contains a small amount of information (comparable to the JavaScript console in the browser) on why the script wouldn’t run.
Failed attempts to run the script won’t cause any destructive errors to AudienceView! When the script compiler throws an error, the City Winery site (and specific show article you were attempting to modify) remain intact as they were just before your attempt to run the script.